




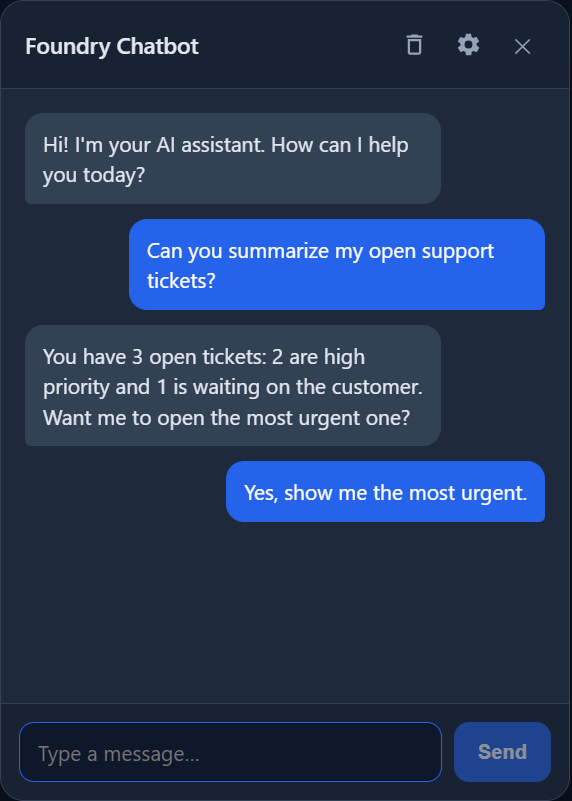
Quick start
Add this single tag to your page, right before the closing </body>:
<script
src="https://your-app.example.com/chatbot-widget.js"
data-title="Support"
data-accent="#2563eb"
defer></script>
Replace the src with the URL where your ChatApp deployment serves
chatbot-widget.js. By default the widget calls back to that same
origin for the chat API; override it with data-api-base when the
backend lives elsewhere.
Theming examples
Brand colours
<script
src=".../chatbot-widget.js"
data-title="Acme Help"
data-accent="#7c3aed"
data-user-bubble="#7c3aed"
data-bot-bubble="#312e81"
defer></script>
Light panel
<script
src=".../chatbot-widget.js"
data-panel="#f8fafc"
data-bot-bubble="#e2e8f0"
data-text="#0f172a"
defer></script>
Custom icon · left side
<script
src=".../chatbot-widget.js"
data-icon="https://cdn.acme.com/bot.png"
data-position="bottom-left"
data-greeting="Hi! How can I help?"
defer></script>
Options reference
All configuration is read from data-* attributes on the script tag.
Every attribute is optional; omit it to keep the default.
Visitors can also switch the panel between light, dark and system themes using the theme button in the header (or the selector in the settings panel); their choice is remembered for the session.
| Attribute | Default | Description |
|---|---|---|
data-api-base |
script origin | Backend base URL the widget calls for chat requests. |
data-title |
Chatbot |
Header title text shown at the top of the panel. |
data-accent |
#2563eb |
Accent colour used for the launcher and primary actions. |
data-icon |
none |
URL of a custom launcher icon image. Allowed schemes:
https:, data:image/, or a root-relative
/path.
|
data-panel |
#1e293b |
Background colour of the chat panel. |
data-user-bubble |
accent | Background colour of user (outgoing) message bubbles. |
data-bot-bubble |
#334155 |
Background colour of bot (incoming) message bubbles. |
data-text |
#e2e8f0 |
Primary text colour inside the panel. |
data-position |
bottom-right |
Anchor corner: bottom-right or bottom-left. |
data-allow-settings |
true |
Set to false to hide the in-panel settings UI. |
data-greeting |
Ask me anything to get started. |
Opening assistant message shown in an empty conversation. |
data-storage-key |
derived | LocalStorage key used to persist the conversation. |
data-debug |
false |
Set to true for verbose console logging. |
Colour values accept hex (#0f172a),
rgb()/rgba(), hsl()/hsla() or CSS named colours.
Invalid values are ignored and fall back to the defaults, so the widget can
never be styled into an unreadable state by a malformed attribute.
Pointing the widget at a backend
When the widget is embedded on a different domain than the ChatApp deployment,
set data-api-base to the deployment URL:
<script
src="https://cdn.acme.com/chatbot-widget.js"
data-api-base="https://chat.acme.com"
data-title="Acme Support"
defer></script>
Make sure the backend allows cross-origin requests from the embedding site (CORS) so the browser can reach the streaming endpoint.
Deploying the backend
The widget is served by the .NET 10 ChatApp backend, which also exposes the streaming chat API. Build the widget bundle, then ship the app as a container.
1. Build the widget bundle
cd src/ChatApp/widget npm install npm run build # outputs ../wwwroot/chatbot-widget.js
2. Build & push the container image
Uses the included script to build the image and push it to Azure Container Registry:
./scripts/build-and-push.ps1 -RegistryName <acrName> -Tag v1
3. Deploy to Azure Container Apps
./scripts/deploy-containerapp.ps1 `
-ResourceGroup rg-chat `
-EnvironmentName cae-chat `
-AppName chatapp `
-RegistryName <acrName> `
-Tag v1 `
-EnvVars @{
AI_MODE = "model"
AZURE_OPENAI_ENDPOINT = "https://<your-resource>.openai.azure.com/"
AZURE_OPENAI_DEPLOYMENT_NAME = "gpt-4o-mini"
}
The deploy script enables a system-assigned managed identity and grants it
AcrPull. Remember to also grant that identity access to your Foundry
resource (e.g. Azure AI User or
Cognitive Services OpenAI User).
Run locally
$env:AI_MODE = "model" $env:AZURE_OPENAI_ENDPOINT = "https://<your-resource>.openai.azure.com/" $env:AZURE_OPENAI_DEPLOYMENT_NAME = "gpt-4o-mini" dotnet run --project src/ChatApp/ChatApp.csproj
Once deployed, the widget script lives at
https://<your-app>/chatbot-widget.js — point the embedding
<script src> there, and set data-api-base if the
page is hosted on a different domain.
Hosting this documentation
This site lives in the docs/ folder of the repository and is
published with GitHub Pages. To enable it:
- Open the repository Settings → Pages.
- Under Build and deployment, set Source to Deploy from a branch.
-
Choose the
mainbranch and the/docsfolder, then Save.
After saving, GitHub publishes the site at
https://<org>.github.io/<repo>/ within a minute or two.